
Takahashi Collimation Scope with Web Cam PROBLEM- Difficulty of viewing Tak Dot @ high Scope Altitudes and longer collimation sessions. SOLUTION- Add a web cam for ease of viewing. At 60 degree altitudes or higher, looking through the eyepiece of the Tak Scope is a real killer on my back and neck. Also, the accuracy of my view can be effected. If you have a rotator, as I do, much more time is needed for tweaking the many set screws in the image train to ADJUST TIR and check the "Tak Dot" centering through the full 360 degrees of rotation. All this can be a real "Pain in the neck." I found a simple solution by mounting a web cam on the rear of the Tak Scope at its prime focus, with the eyepiece removed. This works really well and it's very comfortable for viewing the Tak Dot. You can spend much more time accurately evaluating the collimation of various Altitudes and Postion Angles. Using a Web Cam also provides a much larger view of the target Dot and Ring. |
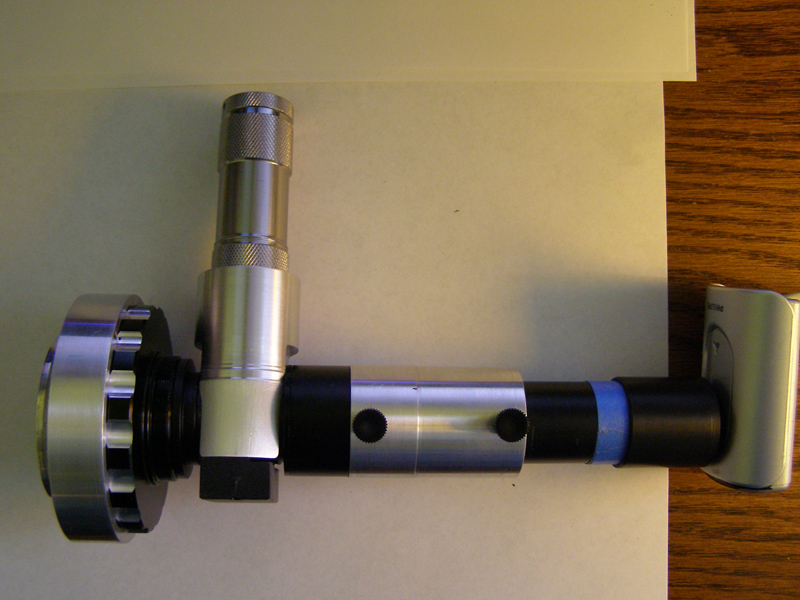
ASSEMBLED UNIT With this setup I can be ready to collimate in just seconds, by removing the camera and attaching the Assembly. |
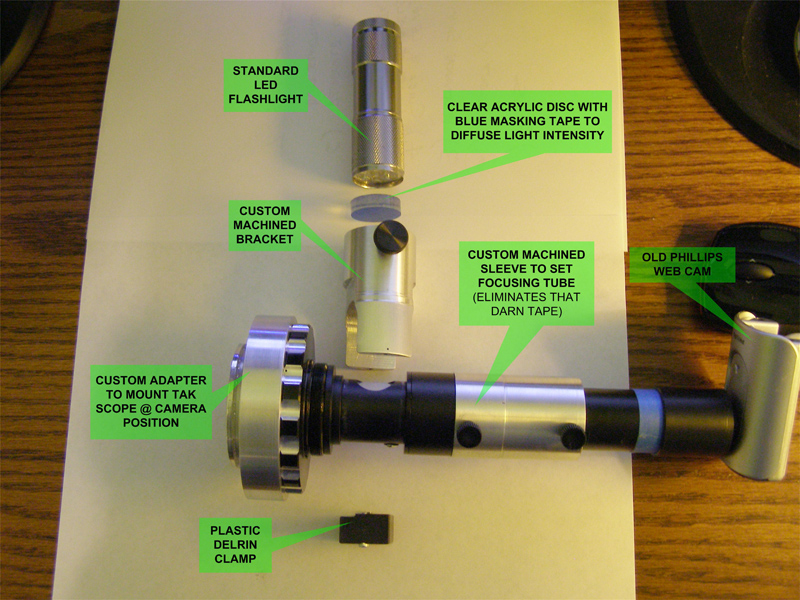
COMPONENTS USED > LED Flashlight- for consistent lighting on "Tak Dot." > Custom Mounting Bracket > Custom Focusing Sleeve. > Web Cam Adapter . Certainly this can be accomplished with fewer parts. In the begining, I simply taped the flashlight to the side of the scope, however I really hate using tape. That's why I also made up the "Focus Sleeve." The camera adapter is a standard 1-1/4" eyepiece to 12mm threaded web cam adapter from ScopeStuff. It did require the I.D. to be machined out a bit (ya can see I missed it- tape still required) to fit over the TakScope tube. This adapter is made out of aluminum....easy to machine. |
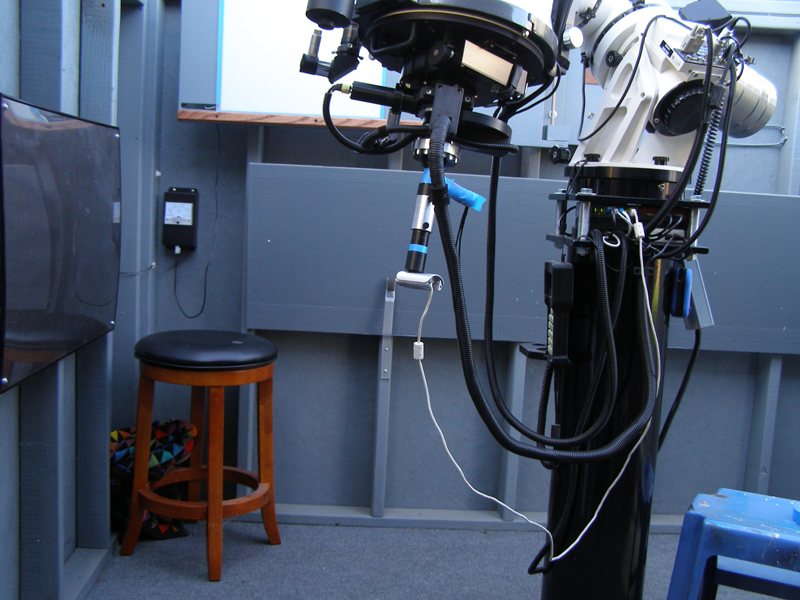
A TYPICALLY DIFFICULT VIEWING POSITION NO PROBLEM with this setup! (shown with flashlight taped on, before bracket.) |
UNIT MOUNTED ON DSI-RC10c SCOPE |
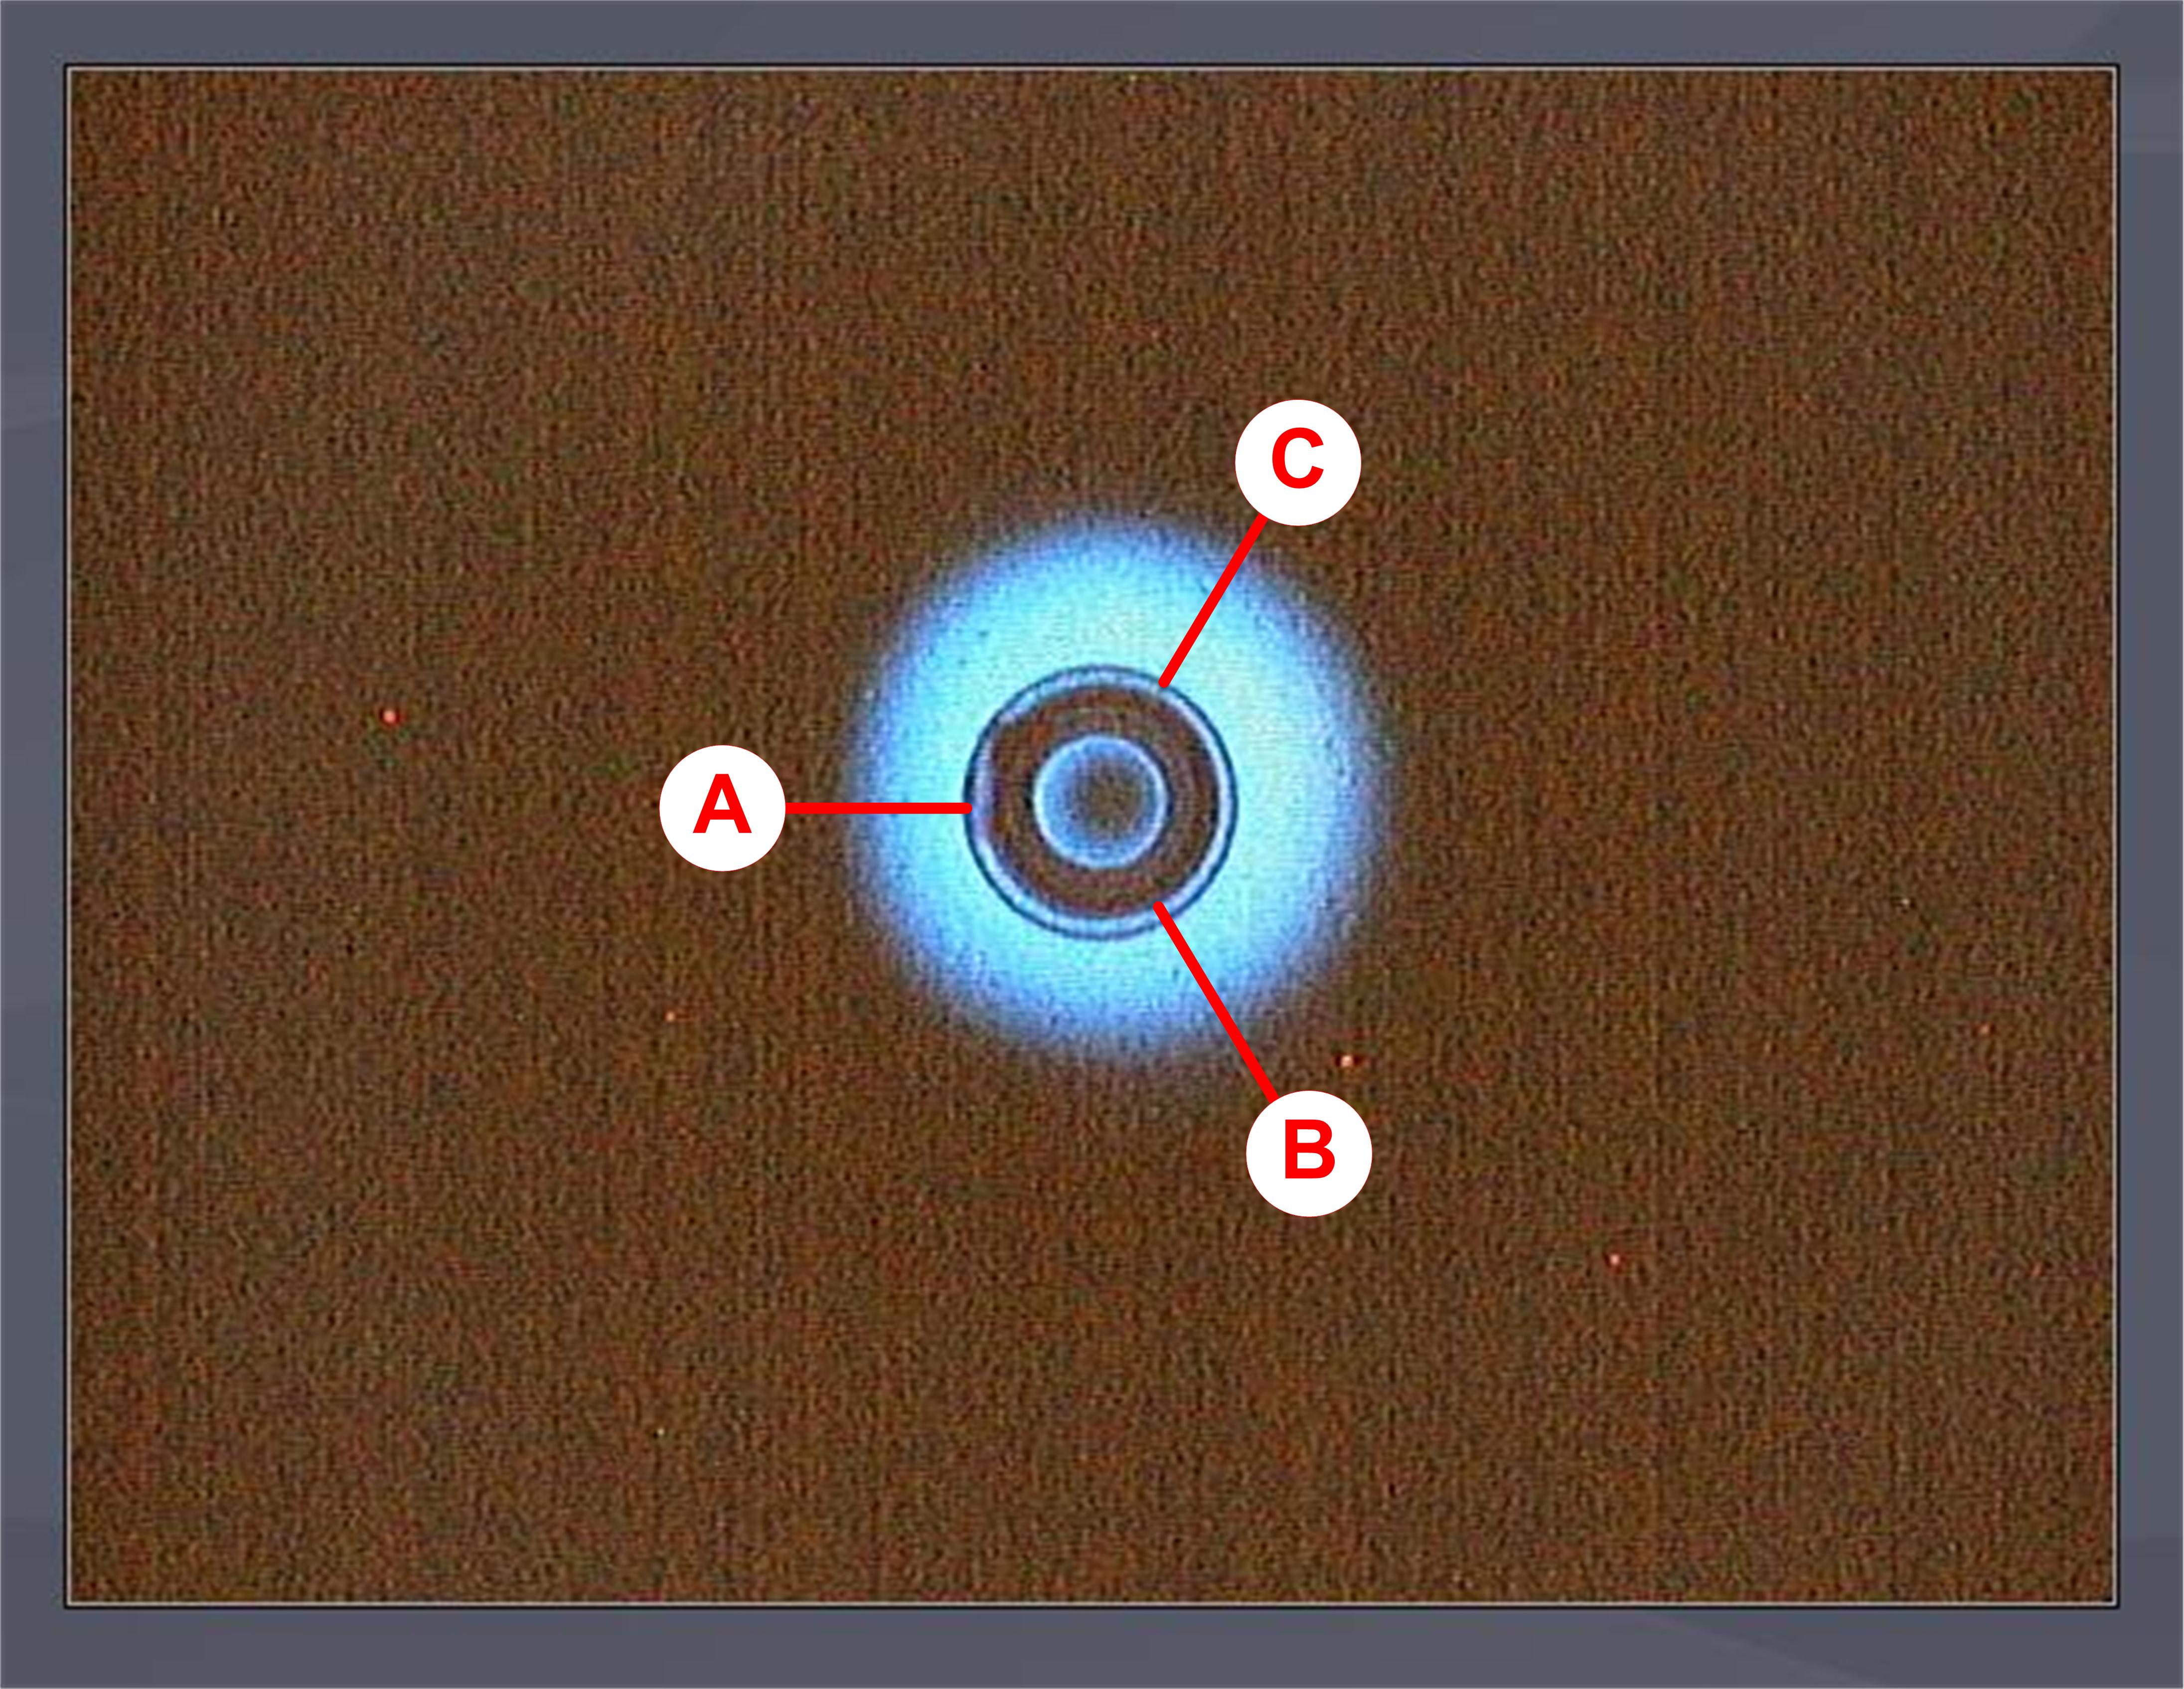
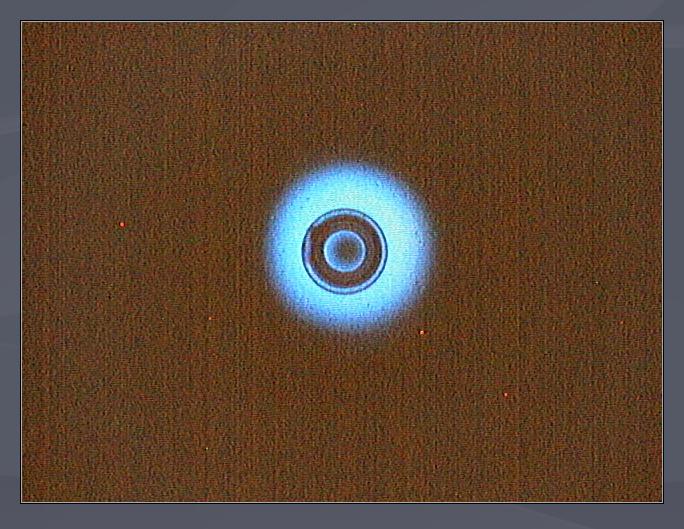
WEB CAM VIEW OF TAK DOT This Web cam view shows the "Tak Dot" and the "Black Ring" on the secondary mirror. The camera really provides a very nice enlarged view of these elements. The relationship between the Dot and Ring can be clearly seen. Fortunately there were small imperfections on the Black Ring surface which made it a bit easier for me to equate the matching locations of the collimation screws A, B & C. |
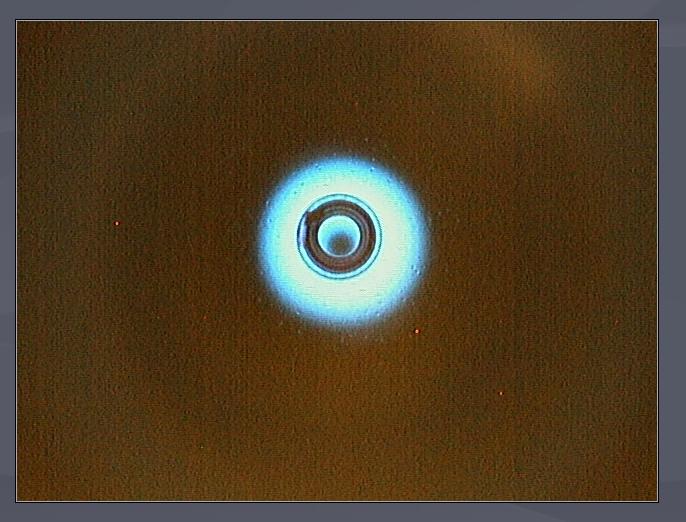
TAK DOT WITH SCOPE TUBE IN HORIZONAL POSITION In the horizontal position, the weight of the "Mirror Baffle Tube/ Focuser Assembly sags slightly causing the dot to shift off center. For this reason, final collimation must be performed with the scope tube at least at an altitude of 50- 60 degrees. |
TAK DOT CENTERING OPTIMIZED This is the final collimation centering after the scope was moved to several various positions 45 - 90 degrees and the rotater move from 0- 360 degrees. Shown is the worst case centering. All other positions were nearly centered or perfectly on center.. |
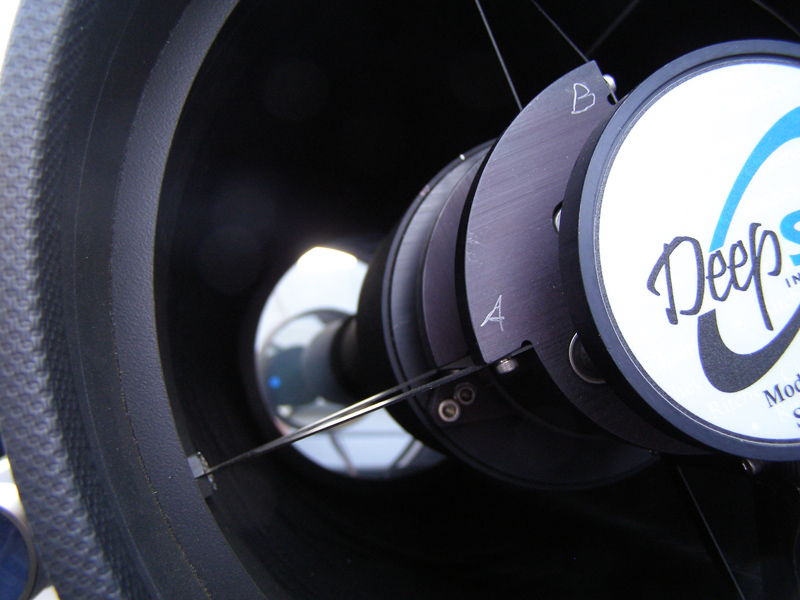
A, B, & C LOCATION MARKS ON FOCUS ASSEMBLY This helps to quickly and easily find and adjust the proper collimation screws. |