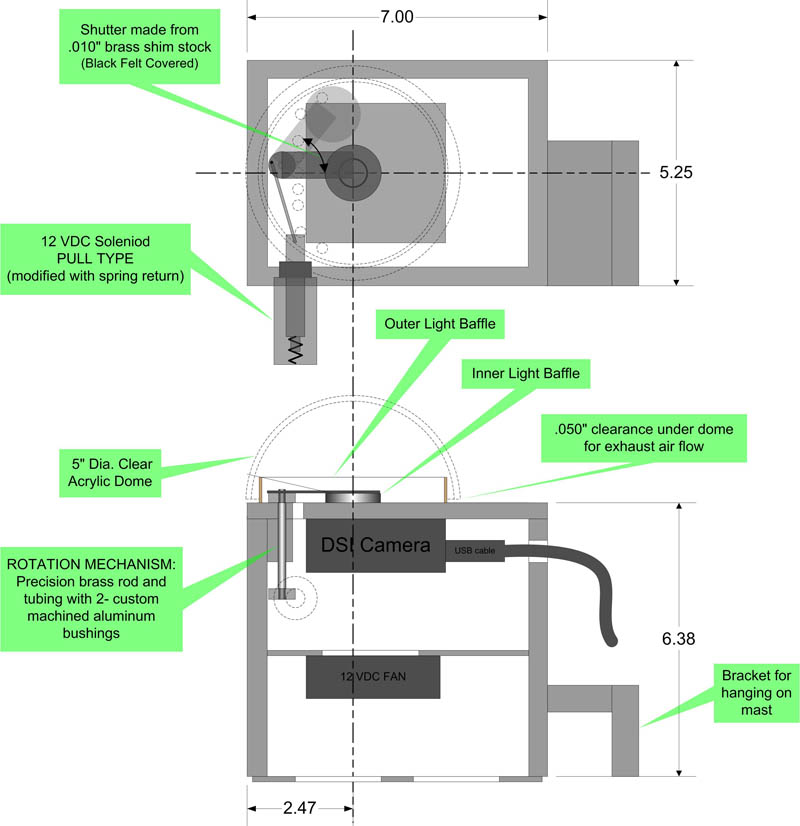
BASIC DESIGN AND COMPONENTS: An old Meade DSI monochrome CCD camera was used, that was just laying around collecting dust. The camera was mounted in a wooden box for ease of construction and component layout. A shutter system was also designed to protect the CCD from direct sunlight during daylight hours. > 1/2" Birch plywood for housing. (primed + 2 coats of exterior latext inside and out) > DSI monochrome CCD- The filter bracket was removed. Custom adapter bushing made to mate lens to camera. > 5" diameter acrylic dome to cover camera and shutter area. > 12VDC 80MM Fan to provide good air flow inside dome and eleminate any fogging. > Soleniod- 12 VDC Pull type to actuate the shutter mechanism. > Fish Eye Lens I could not find the one that I purchased sometime back. This link is the closest comparable unit. |
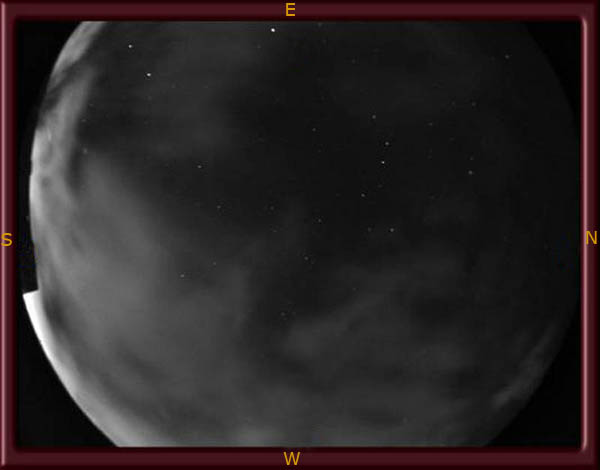
ALL SKY CAMERA CONSTRUCTION This project is an inexpensive approach to providing a nightime view of sky conditions during my imaging sessions. The occasional cloud can easily be detected from my control monitor inside the house. As seen in the image below, a "sucker hole" is opening up around the Big Dipper and clearing seems to be developing from the North-East. Note: The total field of view is ~ 150 Deg. North to South. The step on the South side is a silhouette of the corner roof line on my house. Even though some of the field-stop is cut off in the East and West, there is still plently of visible sky to see approaching clouds. |
DETAILED VIEW OF SHUTTER PIVOT MECHANISM This view (with fan removed) shows the solenoid pistion connecting rod attached to the small lower bushing. As the solenoid plunger pulls back it rotates the lower bushing and upper bushing attached to the shutter. Only 1/4" travel with this arrangement gives enough travel for the required shutter movement. That's about all most of these solenoids will travel. I modified the piston and added an internal spring to return to "home" closed postion. |
FINISHED UNIT |

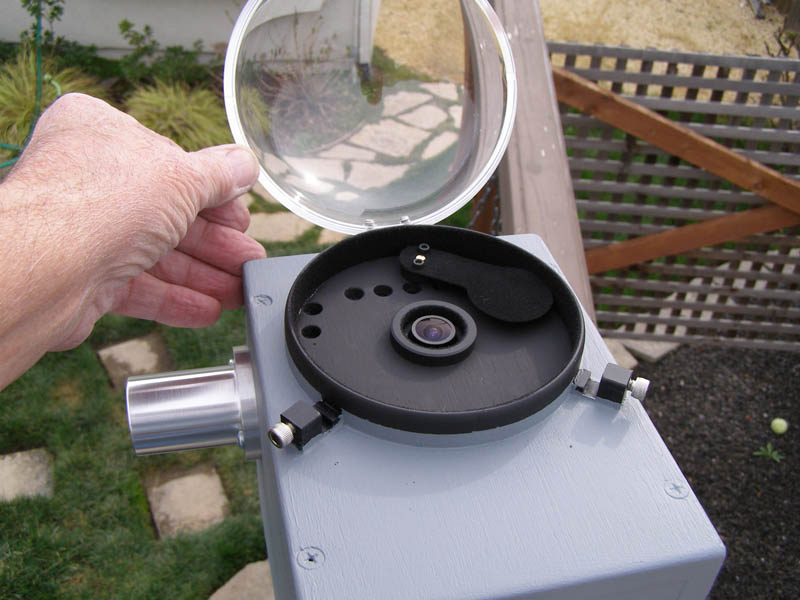
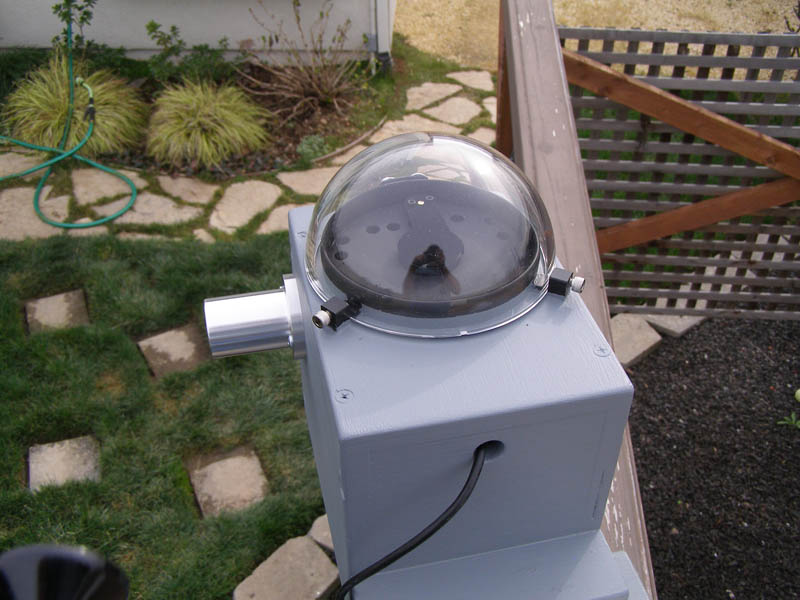
TOP VIEW I made a couple plastic clips with screws to keep the dome closed. Pass thru hole for USB cable will be wraped with a small strip of 1/4" thiclk foam rubber to keep out rain. Holes were drilled in the box under the dome area, for air flow, to eliminated any fogging issues. Air flow inside passes through .050" clearance under dome. |
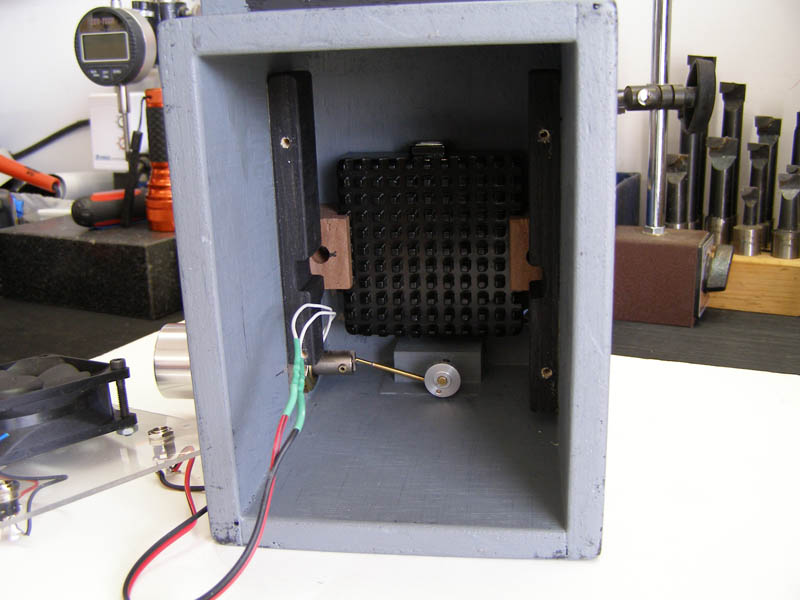
SHUTTER IN OPEN POSITION Approximately 1/4" travel on solenoid pistion will rotate the shutter from the closed postion to the full open postion shown. The outter light baffle / rain shield also acts as stop for the shutter travel distance. |
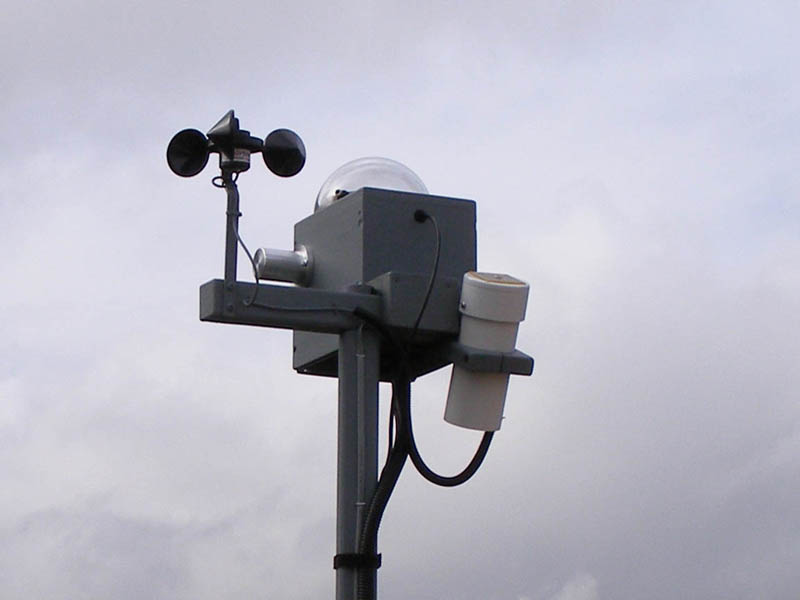
MOUNTED ON WEATHER MAST
|
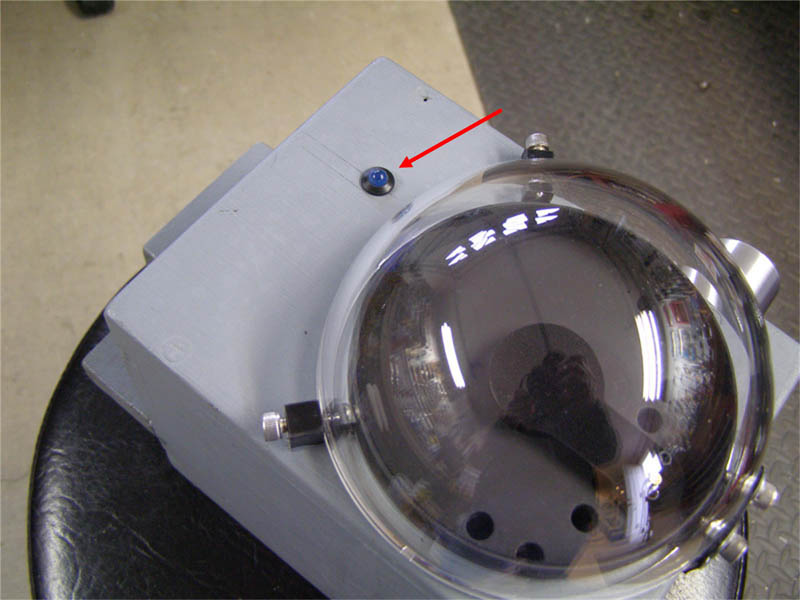
AN AFTER THOUGHT ADD-ON- PHOTO-SENSOR TO CONTOL THE SHUTTER
|
LENS ASSEMBLY FOR CAPTURING LIGHT
The entire assemble was fit into the box and glued in place with super glue. |
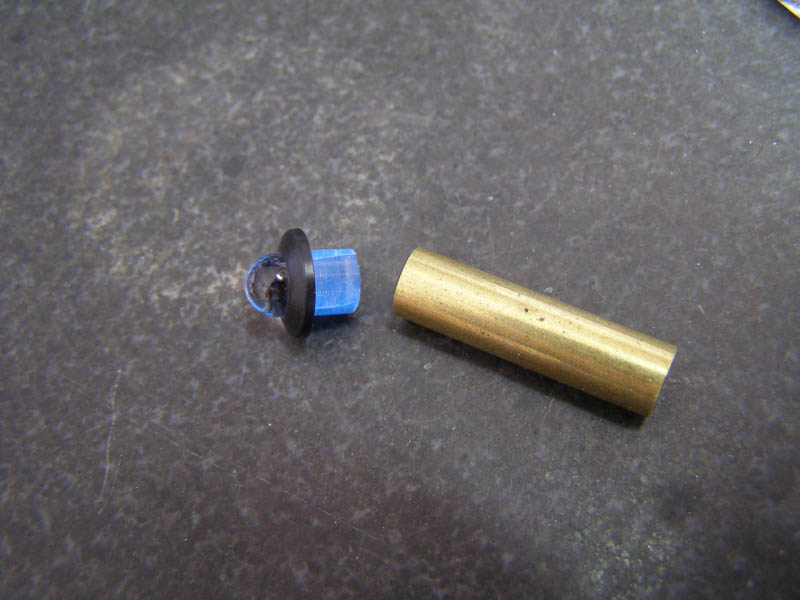
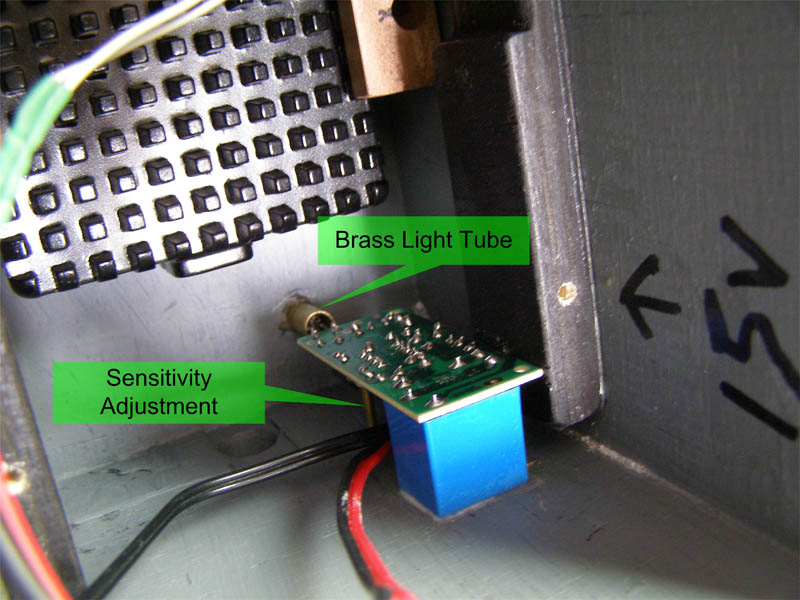
PHOTO SENSOR SWITCH INSTALLED IN CAMERA BOX
|
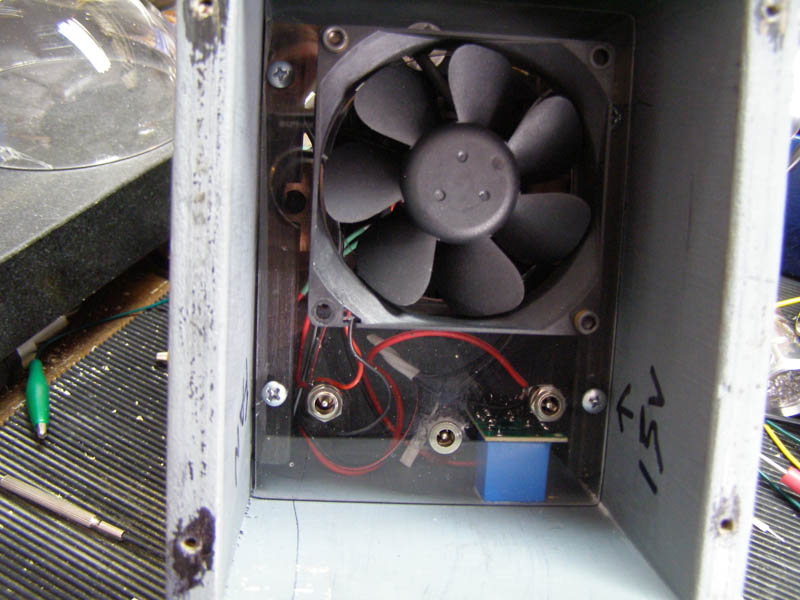
EVERYTHING CLOSED UP WITH FAN COVER PLATE
|
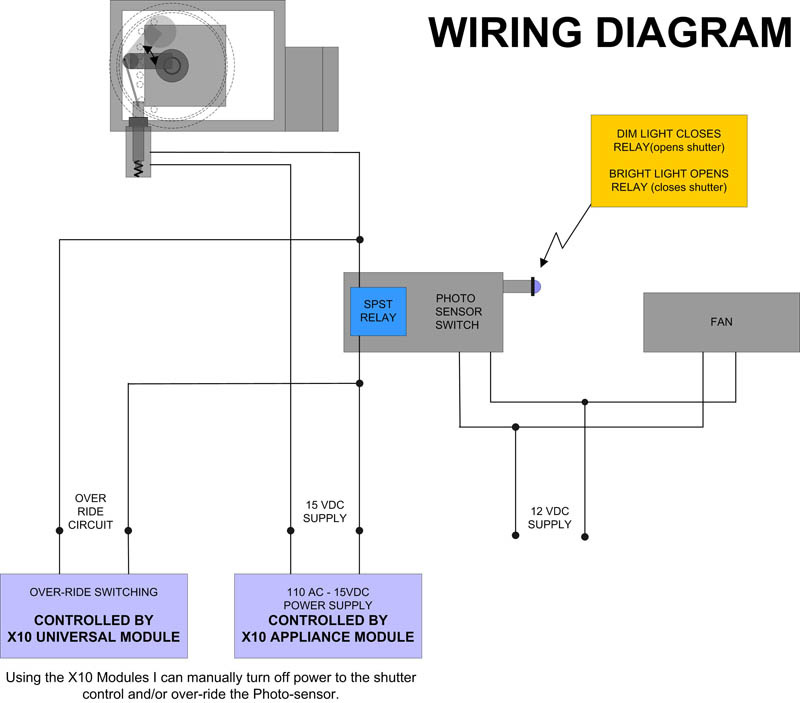
WIRING DIAGRAM
|
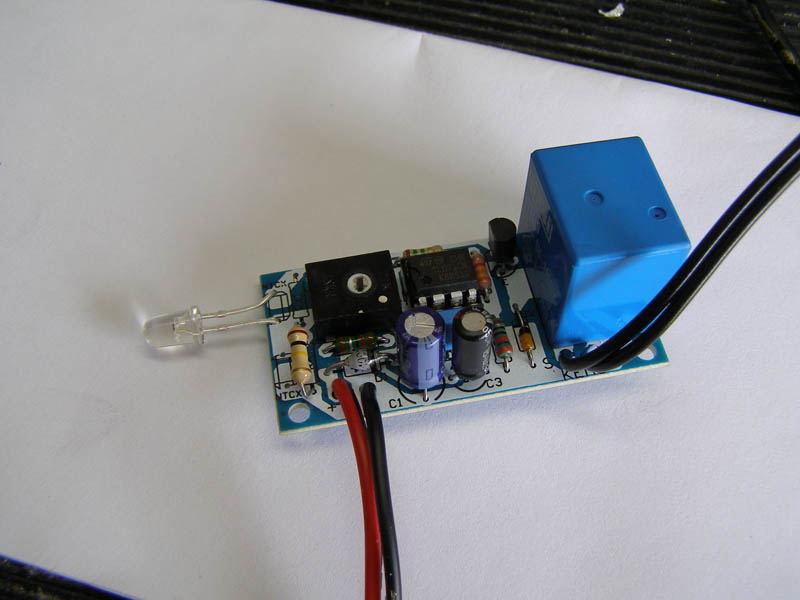
THE PHOTO SENSOR SWITCHING CIRCUIT
The circuit has a SPST Relay Switch for control and will handle 3 amps @ 12 vdc. This is more than enough to handle my solenoid actuator. The unit is powered by 12vdc. Source for the kit: MCM Electronics |
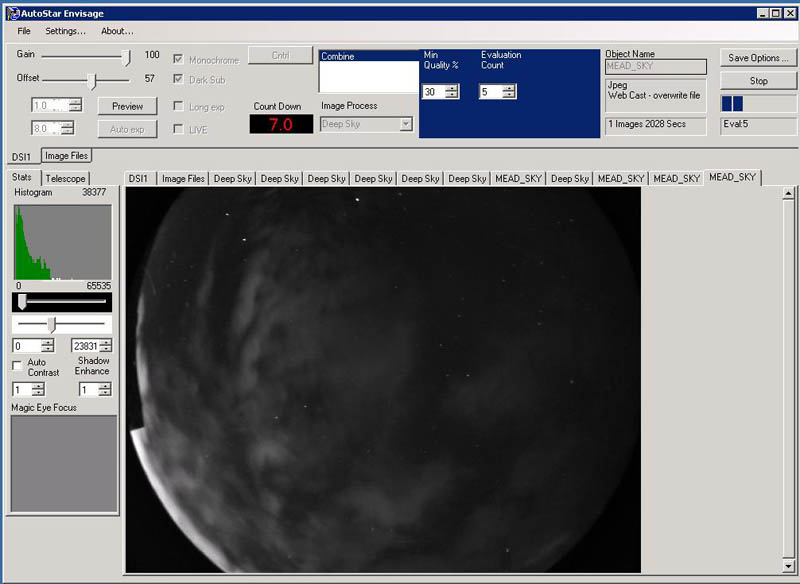
MEAD AUTOSTAR ENVISAGE USED FOR IMAGE CAPTURE I'm running in auto exposure mode, saving the jpg file to my web folder, overwriting the file and refreshing the image on the web page every 5 seconds. I'm taking images @ 8 sec. exposure with dark frame subtraction and you can easily see stars down to 3.5 -4.0 magnitude. NOTE: The Meade DSI CCD camera is very sensitive and works best during dark-sky nights. Sun-lit or Moon-lit skies over-saturate the camera. LINK TO CAMERA |
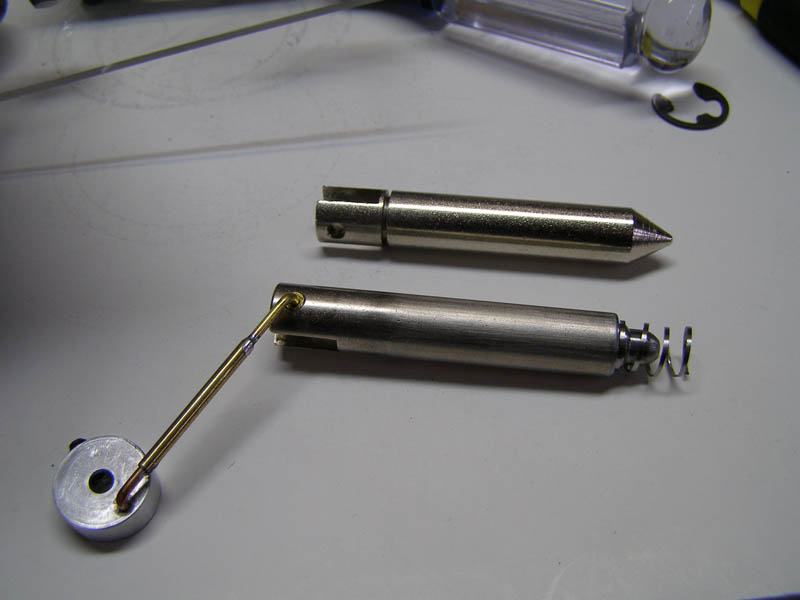
SOLENOID PLUNGER MODIFICATION
|
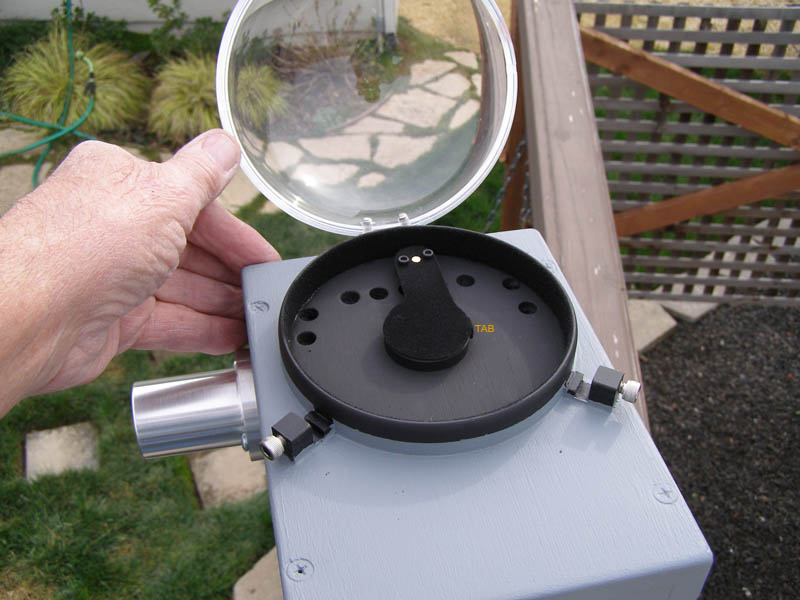
The small turn down tab on the right of the shutter acts as fixed stop for the closed postion. This tab rests against an inner light ring baffle. The inner light ring baffle is just slightly higher than the fish eye lens and the felt covered shutter just clears the top of the baffle to minimized light leaks. NOTE: It's not a perfect light seal, but good enought to protect the camera from direct sun light and produce dark frames on a dark night. Also, the brass shutter was covered (both sides) with Protostar Flocking with adhesive backing. The inside of the light baffles were flocked as well. |